Unlock the hidden potential of your photographs! Mastering photo editing software isn’t about complex techniques; it’s about understanding how fundamental settings interact to create stunning visuals. This guide explores the core adjustments – brightness, contrast, saturation, and beyond – providing practical advice and illustrative examples to transform your images from ordinary to extraordinary. We’ll cover everything from basic adjustments to advanced techniques like curves and masking, ensuring you can enhance any image, regardless of subject matter.
Whether you’re a seasoned photographer or just starting out, this guide offers clear, actionable steps to improve your image quality. We’ll delve into the nuances of each setting, showing you how subtle changes can dramatically impact the overall aesthetic. Learn to harness the power of your editing software to achieve professional-looking results, elevating your photography to new heights.
Understanding Basic Photo Editing Software Settings

Mastering basic photo editing settings is crucial for transforming your snapshots into compelling images. A strong grasp of brightness, contrast, and saturation allows you to significantly improve the overall look and feel of your photos, regardless of your subject matter. Understanding how these settings interact is key to achieving professional-looking results.
Brightness, Contrast, and Saturation: Their Individual Impacts
Brightness, contrast, and saturation are fundamental adjustments that affect the overall tone and vibrancy of your images. Brightness controls the overall lightness or darkness of the image. Increasing brightness makes the image lighter, while decreasing it darkens it. Contrast adjusts the difference between the darkest and lightest areas of the image. High contrast creates a dramatic look with stark shadows and highlights, while low contrast results in a softer, more muted image.
Saturation controls the intensity of the colors. High saturation produces vibrant, bold colors, while low saturation creates a more muted or desaturated look. Improper adjustment of any of these can lead to washed-out, dull, or overly harsh images.
Adjusting Settings for Different Photo Types
The optimal settings for brightness, contrast, and saturation vary depending on the type of photograph and the desired aesthetic.
For portraits, a slightly higher contrast can help to define facial features and create a more striking image. However, be careful not to over-do the contrast, as this can lead to harsh shadows and a less natural look. Slightly increasing saturation can also enhance skin tones and make the portrait more vibrant, but again, moderation is key.
Brightness adjustments should primarily focus on ensuring proper exposure of the subject’s face.
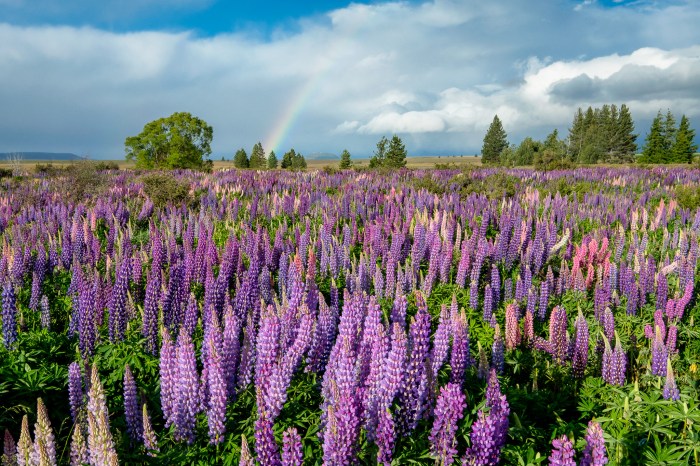
Landscapes often benefit from a slightly lower contrast to preserve detail in both the highlights and shadows. Adjusting saturation can enhance the colors of the sky, foliage, and other elements within the scene. Brightness should be adjusted to ensure a balanced exposure, avoiding overly bright skies or dark shadows. Consider selectively adjusting brightness in different areas of the landscape to further enhance its visual appeal.
Product photography often requires precise control of brightness and contrast to accurately represent the product’s texture and color. Accurate color representation is key; thus, careful attention to saturation is necessary. Avoid over-saturation, which can make the product appear unnatural or unrealistic. Brightness and contrast should be adjusted to ensure the product is well-lit and clearly visible against the background.
Example Adjustments and Their Visual Effects
The following table illustrates the effects of varying brightness, contrast, and saturation levels on a sample image. Imagine a photo of a red rose against a green background.
| Setting | Brightness | Contrast | Saturation |
|---|---|---|---|
| Original Image | (Image showing a rose with balanced brightness, contrast, and saturation) | (Image showing a rose with balanced brightness, contrast, and saturation) | (Image showing a rose with balanced brightness, contrast, and saturation) |
| Increased Brightness | (Image showing a rose brighter, possibly washed-out highlights) | (Image showing a rose with slightly increased contrast, more defined petals) | (Image showing a rose with more vibrant colors, possibly slightly unnatural) |
| Decreased Brightness | (Image showing a rose darker, possibly losing detail in shadows) | (Image showing a rose with decreased contrast, muted colors) | (Image showing a rose with desaturated colors, appearing dull) |
| Increased Contrast | (Image showing a rose with more defined petals and leaves, but possibly harsh shadows) | (Image showing a rose with increased contrast, more defined petals and leaves) | (Image showing a rose with more intense colors, possibly overly dramatic) |
| Decreased Contrast | (Image showing a rose with less defined features, softer look) | (Image showing a rose with less defined features, softer look) | (Image showing a rose with less intense colors, a more muted look) |
| Increased Saturation | (Image showing a rose with brighter, more intense red and green) | (Image showing a rose with brighter, more intense red and green) | (Image showing a rose with more vibrant and intense colors) |
| Decreased Saturation | (Image showing a rose with muted, less intense red and green) | (Image showing a rose with muted, less intense red and green) | (Image showing a rose with duller, less intense colors) |
Advanced Techniques for Image Enhancement
Now that we’ve covered the basics, let’s delve into some more advanced techniques to truly elevate your photo editing skills. These methods allow for more precise control and creative expression, transforming your images from good to exceptional. Mastering these techniques will significantly improve the overall quality and impact of your photographs.
Curves Adjustments
Curves adjustments offer a powerful way to fine-tune the tonal range of your image. Unlike simple brightness and contrast controls, curves allow for precise adjustments to specific tonal areas. The curve graph represents the input (original pixel values) on the horizontal axis and the output (adjusted pixel values) on the vertical axis. A straight diagonal line represents no adjustment.
By manipulating points along this line, you can selectively lighten or darken specific areas. For example, raising a point in the mid-tones will brighten the mid-range values, while lowering a point in the shadows will darken the darker parts of the image. This level of granular control allows for subtle yet impactful changes, creating a more natural and balanced image.
Experimentation is key to mastering curves; observe how different adjustments affect the overall image’s look and feel.
Levels Adjustments
Levels adjustments, while simpler than curves, still provide significant control over tonal distribution. This tool primarily focuses on the histogram, a graphical representation of the distribution of tones in your image. The histogram shows the number of pixels at each brightness level, from pure black to pure white. The levels adjustment allows you to adjust the black point (shadow), white point (highlight), and mid-tone levels.
By adjusting these points, you can expand the dynamic range of your image, increasing contrast and detail. For instance, moving the black point to the right will darken the shadows, while moving the white point to the left will darken the highlights. This technique can be especially useful for recovering detail in overexposed or underexposed images.
Comparison of Sharpening Techniques
Several sharpening techniques exist, each with its own strengths and weaknesses. Unsharp Mask is a classic technique that works by detecting edges and increasing the contrast around them. It’s generally effective and relatively easy to use. However, it can sometimes create halos around sharp edges if overused. Smart Sharpen is a more sophisticated algorithm that often produces more natural results, particularly in areas with fine detail.
It offers several settings to fine-tune the sharpening effect, reducing the risk of unwanted artifacts. Radius, Amount, and Threshold are key parameters to adjust; a smaller radius sharpens finer details, while a larger radius affects larger areas. Experimenting with these settings is essential to achieve the desired level of sharpness without introducing harshness. Finally, output sharpening, often done at the final export stage, is typically less aggressive and serves to compensate for potential softening during resizing or other processes.
Noise Reduction Techniques
Digital noise, those pesky specks and graininess, can detract from the overall quality of an image, especially in low-light situations. Noise reduction algorithms aim to reduce this noise without sacrificing detail. Different algorithms use varying approaches, some more aggressive than others. A strong noise reduction setting might effectively remove noise but also blur fine details, resulting in a softer image.
A weaker setting may preserve detail but leave some noise visible. The optimal setting depends on the level of noise and the amount of detail present in the image. It’s often beneficial to experiment with different noise reduction tools and settings to find the best balance between noise reduction and detail preservation. Consider the image’s content; heavily textured areas might require a more careful approach to avoid losing important detail.
Masking Techniques for Selective Enhancement
Masking allows you to selectively apply adjustments to specific areas of an image without affecting other parts. This is achieved by creating a mask—essentially a layer that determines which parts of the image are affected by the adjustments. A common technique is using layer masks. By painting on the mask with black, you hide the effects of the layer below; painting with white reveals them.
This allows for precise control over the application of effects. For example, you could use a mask to selectively sharpen only a subject’s face while leaving the background untouched. Other masking techniques include gradient masks for smooth transitions and luminosity masks for tonal selection. The choice of masking method depends on the specific task and the desired result.
Practicing with different masking techniques will enhance your ability to refine and perfect your image edits.
Specialized Editing for Different Image Types

Different image types demand unique editing approaches to optimize their visual appeal and effectively convey their intended message. Understanding these nuances is crucial for achieving professional-looking results, whether you’re editing portraits for a personal portfolio, landscapes for a travel blog, or product shots for an online store. This section will explore best practices for various image categories.
Portrait Photo Editing
Optimizing portrait photos involves a delicate balance between enhancing natural features and maintaining a realistic appearance. The primary focus is usually on skin tone and sharpness. To achieve a flawless complexion, subtle adjustments are key. Reducing blemishes and smoothing skin texture can be accomplished using tools like the healing brush or clone stamp, ensuring natural-looking results. Avoid over-smoothing, which can lead to an artificial, mask-like effect.
Sharpening should be applied carefully, focusing on the eyes and other important details to make them pop without introducing harsh artifacts. Subtle adjustments to contrast and brightness can further enhance the subject’s features and create a more captivating image. For example, slightly increasing contrast can help define facial features, while carefully adjusting brightness can ensure the subject’s skin tone looks natural and vibrant.
Landscape Photography Enhancement
Landscape photography often involves a wide dynamic range, meaning significant differences between the brightest and darkest parts of the image. This requires careful attention to recovering details in both highlights and shadows. Tools like HDR (High Dynamic Range) merging or advanced tone mapping can help to bring out detail in areas that might otherwise be completely blown out or crushed.
Color grading is also crucial in landscape photography, playing a vital role in establishing mood and atmosphere. Using tools to adjust saturation, vibrance, and hue can significantly impact the overall feel of the image. For instance, boosting blues and greens can enhance the feeling of a serene, natural landscape, while warming the tones can create a more dramatic, sunset-like effect.
Careful consideration of white balance is also essential to ensure accurate color representation.
E-commerce Product Photo Optimization
Product photography for e-commerce requires a highly controlled and consistent approach. The goal is to showcase the product accurately and attractively, encouraging sales. This involves meticulous attention to detail and lighting. Sharpness is paramount; blurry product images are often unacceptable. Backgrounds should be clean and uncluttered, allowing the product to stand out.
Color accuracy is crucial; colors must be consistent with the actual product. White balance correction is essential to ensure that colors appear natural and true-to-life. Additionally, careful attention should be paid to removing any unwanted shadows or reflections. For example, a well-lit product photo with a neutral background will often outperform a poorly lit image with distracting elements.
Consistent lighting across a range of product photos is also important for a cohesive and professional presentation.
Color Balancing Techniques
Color balancing tools allow for precise adjustments to the overall color temperature and tint of an image. The “white balance” tool is often used to correct color casts caused by different light sources (incandescent, fluorescent, daylight). Correcting a color cast involves adjusting the color temperature to make white areas appear truly white, and then adjusting the tint to neutralize any remaining color shifts.
For example, an image shot under incandescent lighting might appear too orange or yellow. By increasing the color temperature, we can shift the image towards cooler tones, making the overall color more balanced and natural. Conversely, an image shot under fluorescent lighting might appear too green or blue. In this case, adjusting the tint towards warmer tones can neutralize the color cast and restore natural-looking colors.
The visual impact of accurate color balancing is a significant improvement in the realism and overall appeal of the image, leading to more pleasing and professional-looking results.
Final Review
By mastering the art of photo editing, you’re not just altering pixels; you’re shaping narratives, enhancing emotions, and crafting visual masterpieces. From understanding the fundamental interplay of brightness, contrast, and saturation to mastering advanced techniques like curves and masking, this guide has equipped you with the knowledge to transform your images. Remember, the journey to mastering photo editing is a continuous process of experimentation and refinement.
So, explore, experiment, and most importantly, have fun enhancing your photographic creations!