Experience the transformative power of a perfectly adjusted screen resolution. From the crisp clarity of 4K to the subtle nuances of 1080p, your screen’s resolution significantly impacts your visual experience. This guide explores the relationship between pixels and image quality, offering practical steps to optimize your display settings for any device, regardless of operating system. Discover how adjusting resolution can dramatically enhance your viewing pleasure, whether you’re gaming, editing photos, or simply browsing the web.
We’ll cover methods for adjusting screen resolution on Windows, macOS, Android, and iOS, providing clear instructions and visual aids to guide you through the process. Beyond resolution, we’ll delve into additional settings such as scaling, brightness, and contrast to further refine your visual experience and achieve optimal comfort and visual appeal. Prepare to unlock the full potential of your screen’s capabilities.
Understanding Screen Resolution and its Impact on Visual Quality
Screen resolution is a crucial factor determining the visual quality of what you see on your display. A higher resolution generally translates to sharper, clearer images and text, but understanding the nuances of resolution and its impact requires looking beyond just the numbers. This section will explore the relationship between resolution, pixel density, and the overall visual experience.
Screen Resolution and Image Clarity
Screen resolution refers to the number of pixels displayed horizontally and vertically on your screen. This is typically expressed as a pair of numbers, such as 1920 x 1080 (often shortened to 1080p). The more pixels, the more detail the screen can display. Each pixel is a tiny square of color, and more pixels mean more squares to create the image, resulting in a finer level of detail and a sharper picture.
Conversely, fewer pixels mean a coarser image with visible pixelation, particularly noticeable when viewing text or fine details.
Common Resolutions and Their Visual Impact
Several common resolutions are prevalent in modern displays. 1080p (1920 x 1080 pixels) is a Full HD resolution widely used in many televisions and computer monitors. It offers a good balance between image quality and affordability. 4K (3840 x 2160 pixels), also known as Ultra HD, boasts four times the number of pixels as 1080p, resulting in significantly sharper images with considerably more detail.
The difference is readily apparent, especially on larger screens where the increased pixel density becomes more noticeable. Higher resolutions like 8K (7680 x 4320 pixels) exist, but their adoption is still relatively limited due to higher cost and the need for more powerful hardware.
Image Scaling at Different Resolutions
When an image isn’t the native resolution of the display, the system needs to scale it up or down. Scaling up a lower-resolution image to fit a higher-resolution screen can lead to a blurry or pixelated appearance because the system is essentially “guessing” at the missing pixel information. Conversely, scaling down a high-resolution image to a lower-resolution display might result in some loss of detail, although it’s generally less noticeable than upscaling.
For example, a photograph taken at a high resolution (e.g., 50 megapixels) will look crisper on a 4K display than on a 1080p display. Conversely, a low-resolution image (e.g., from a webcam) will appear noticeably more pixelated on a 4K screen than on a 1080p screen.
Resolution, Pixel Density, and Visual Sharpness Comparison
The visual sharpness isn’t solely determined by resolution; pixel density (PPI – pixels per inch) also plays a significant role. PPI measures the number of pixels packed into each inch of the screen. A higher PPI results in a sharper image, even at the same resolution. A larger screen with the same resolution will have a lower PPI than a smaller screen with the same resolution.
| Resolution | Pixel Density (PPI – Approximate) on a 24-inch screen | Visual Sharpness | Example Use Case |
|---|---|---|---|
| 720p (1280 x 720) | ~60 PPI | Lower; noticeable pixelation, especially on larger screens. | Older budget laptops, smaller tablets |
| 1080p (1920 x 1080) | ~90 PPI | Good for everyday use; sufficient sharpness for most applications. | Most modern laptops, many TVs and monitors |
| 1440p (2560 x 1440) | ~120 PPI | High; noticeable improvement over 1080p, especially on larger screens. | High-end gaming monitors, professional displays |
| 4K (3840 x 2160) | ~180 PPI | Very high; extremely sharp and detailed image, ideal for large screens. | High-end TVs, professional video editing setups |
Methods for Changing Screen Resolution
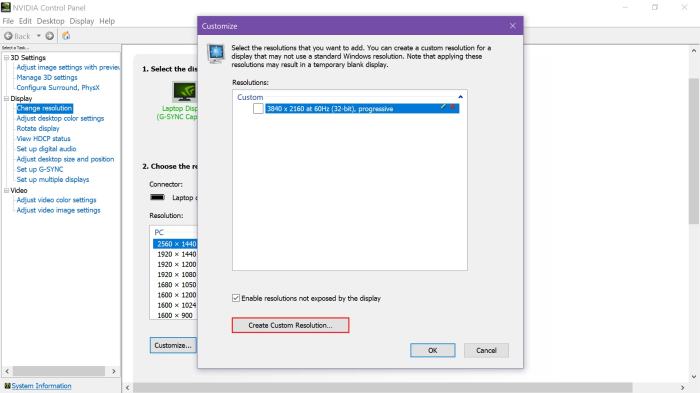
Altering your screen resolution is a straightforward process, regardless of your operating system. The steps involved may vary slightly, but the underlying principle remains the same: locating the display settings and adjusting the resolution to your preferred value. This section details the methods for changing screen resolution on various platforms.
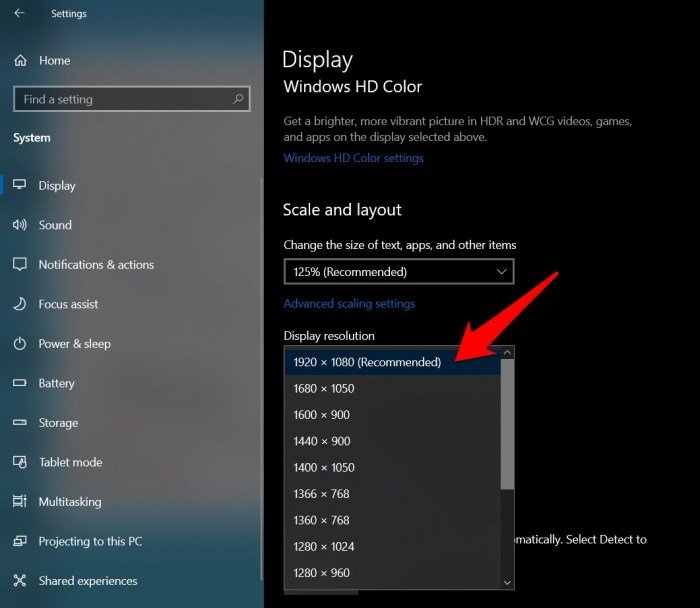
Changing Screen Resolution on Windows
To adjust your screen resolution on a Windows operating system (Windows 10 and 11 are used as examples, but the process is similar in other versions), follow these steps:
- Right-click on an empty area of your desktop.
- Select “Display settings” from the context menu.
- Locate the “Display” section. You’ll find a slider or dropdown menu labeled “Resolution” or similarly named.
- Use the slider or dropdown to select your desired resolution. Higher numbers generally indicate sharper images, but may also make on-screen elements smaller.
- Click “Apply” or “Keep changes.” Windows might briefly display a preview of the new resolution before making the change permanent. If the new resolution is unsuitable, you can quickly revert to the previous setting.
Changing Screen Resolution on macOS
Adjusting the screen resolution on a macOS system is equally simple:
- Click the Apple menu in the top-left corner of your screen.
- Select “System Settings.”
- Click on “Displays.”
- Under “Resolution,” select your preferred resolution from the dropdown menu. Again, higher resolutions usually mean better clarity but smaller text and icons.
- The changes will take effect immediately. If the new resolution is not satisfactory, simply choose a different option from the menu.
Changing Screen Resolution on Android and iOS
Mobile operating systems also offer easy ways to manage screen resolution, though the level of control may be less extensive than on desktop operating systems. Android devices generally offer a limited number of pre-set resolutions, whereas iOS provides options for adjusting text and display size rather than a direct resolution setting.
- Android: The exact steps vary depending on the Android version and device manufacturer. Generally, you’ll need to navigate to the “Settings” app, then look for options like “Display,” “Screen,” or “Resolution.” From there, you may find a selection of pre-defined resolutions.
- iOS: iOS focuses on display scaling rather than direct resolution control. Go to “Settings,” then “Display & Brightness.” You can adjust the “Display Zoom” to make on-screen elements larger or smaller, effectively changing the perceived resolution. There is no direct way to select specific pixel dimensions.
Flowchart Illustrating the General Process of Adjusting Screen Resolution
Imagine a flowchart. The starting point is “Access Display Settings.” This branches to three paths: Windows, macOS, and Mobile (Android/iOS). Each path has a box representing “Select Resolution,” followed by a decision box: “Is Resolution Satisfactory?” If yes, the flow ends. If no, it loops back to “Select Resolution.” All paths ultimately lead to “Apply/Save Changes.” This illustrates the common steps across different platforms, although the specific steps within each operating system’s settings differ.
Optimizing Visual Settings Beyond Resolution

Setting the correct screen resolution is a crucial first step in enhancing visual quality, but it’s not the only factor. Several other display settings significantly impact the overall viewing experience, affecting clarity, text readability, and color accuracy. Optimizing these settings alongside resolution ensures a more comfortable and visually appealing display.
Beyond resolution, scaling and display technology play pivotal roles in determining the final visual output. Understanding how these elements interact allows for a more refined and personalized visual experience tailored to individual preferences and hardware capabilities.
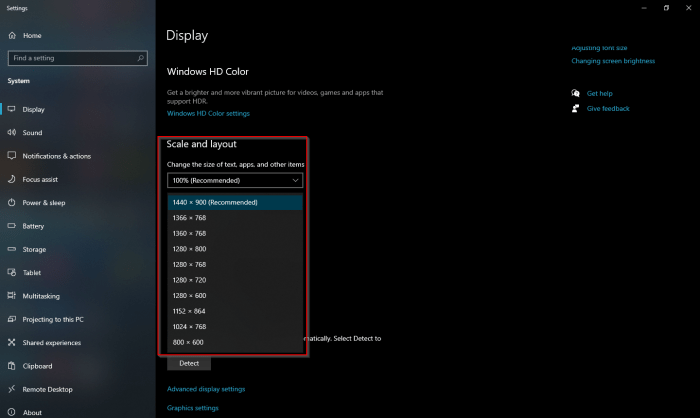
Scaling Settings and Their Impact on Visual Clarity and Text Size
Scaling adjusts the size of on-screen elements without altering the resolution. This is particularly beneficial on high-resolution displays where default settings might result in tiny text and icons. Higher scaling percentages enlarge elements, making them easier to read and interact with, but can potentially reduce sharpness at very high levels. Conversely, lower scaling percentages might improve sharpness but at the cost of smaller, less legible elements.
The optimal scaling level depends on factors such as screen size, resolution, and individual eyesight. For example, a 4K display on a large monitor might benefit from a lower scaling percentage, while a high-resolution display on a smaller screen might require a higher percentage for comfortable viewing. Experimentation is key to finding the best balance between sharpness and readability.
Optimal Scaling Options for Different Screen Sizes and Resolutions
The ideal scaling setting isn’t universally applicable. A 27-inch 1080p display might require a higher scaling percentage than a 32-inch 4K display. Factors like individual eyesight and preference also play a role. Generally, users with less-than-perfect vision might opt for higher scaling, while those with sharper vision might prefer lower settings. Modern operating systems often offer a range of scaling options, allowing users to fine-tune the setting to their exact needs.
For instance, Windows allows for custom scaling percentages, enabling users to find the perfect balance between clarity and readability. macOS provides similar options, though their implementation might differ slightly. Ultimately, the best approach is to experiment with different settings to find the most comfortable and visually appealing configuration.
Comparison of Display Technologies and Their Effects on Visual Quality
Different display technologies offer varying levels of visual quality. LCD (Liquid Crystal Display) screens are prevalent due to their affordability and energy efficiency. However, LCDs generally offer less contrast and deeper blacks compared to OLED (Organic Light-Emitting Diode) displays. OLED displays boast superior contrast ratios and incredibly deep blacks, resulting in richer, more vibrant images. However, OLED technology is generally more expensive than LCD.
Other technologies like QLED (Quantum dot LED) aim to bridge the gap between LCD and OLED, offering enhanced color accuracy and brightness. The choice between display technologies depends on budget, desired visual quality, and specific needs. For example, a professional photo editor might prioritize an OLED display for its superior color accuracy, while a casual user might find an LCD screen perfectly adequate.
Additional Display Settings to Enhance Visual Experience
Several additional display settings can further improve visual comfort and quality beyond resolution and scaling. These settings allow for a personalized viewing experience tailored to individual preferences and ambient lighting conditions.
Careful adjustment of these settings can significantly impact the overall visual experience, leading to less eye strain and a more enjoyable viewing experience.
- Brightness: Adjust brightness to match the ambient lighting. Too high brightness can cause eye strain, while too low brightness makes it difficult to see details.
- Contrast: Contrast affects the difference between the darkest and brightest parts of the image. A higher contrast ratio can result in more vibrant and detailed images, but excessive contrast can lead to washed-out colors or overly dark shadows.
- Color Temperature: Color temperature refers to the warmth or coolness of the colors displayed. Cooler temperatures (higher Kelvin values) tend to have a bluish tint, while warmer temperatures (lower Kelvin values) have a yellowish tint. Adjusting color temperature can improve the visual appeal and reduce eye strain, particularly in low-light conditions.
Last Word
Mastering your screen’s resolution is more than just a technical adjustment; it’s about enhancing your overall digital experience. By understanding the interplay between resolution, pixel density, and display technology, you can transform how you interact with your devices. From the detailed instructions provided to the exploration of supplementary settings, this guide empowers you to tailor your screen to your preferences, ensuring optimal visual clarity and comfort.
Take control of your visual environment and enjoy a significantly improved viewing experience.