Mastering video editing isn’t just about cutting and pasting clips; it’s about harnessing the power of settings to transform raw footage into captivating narratives. From understanding the fundamentals of resolution and frame rate to optimizing your videos for various platforms and employing advanced techniques like color grading and audio enhancement, this guide provides a comprehensive approach to elevating your video production.
We’ll explore how subtle adjustments can dramatically impact the viewer experience, ensuring your videos are not only technically sound but also emotionally resonant.
This exploration delves into the core settings within most video editing software, examining their impact on video quality, file size, and overall aesthetic. We’ll cover optimizing settings for different platforms like YouTube, Instagram, and TikTok, ensuring your videos are perfectly tailored for each audience. Finally, we’ll touch upon advanced techniques, such as color correction and audio mastering, to polish your videos to a professional standard, ready for sharing with the world.
Understanding Video Editing Software Settings
Navigating the settings within your video editing software is crucial for achieving the desired visual impact and ensuring your videos are optimized for their intended platform and audience. Understanding core settings like resolution, frame rate, and aspect ratio allows for greater control over the final product, resulting in more compelling and professional-looking videos. Let’s delve into these key settings.
Video Resolution Settings
Resolution determines the clarity and detail of your video. Higher resolutions result in sharper images but significantly larger file sizes. Conversely, lower resolutions offer smaller file sizes but compromise image quality. The choice depends on the intended use and platform for your video. The following table illustrates the impact of different resolutions:
| Resolution | File Size Impact | Quality Impact | Common Uses |
|---|---|---|---|
| 480p (640×480) | Small | Low | Older devices, low-bandwidth platforms |
| 720p (1280×720) | Medium | Medium | Web videos, social media |
| 1080p (1920×1080) | Large | High | Blu-ray discs, high-definition televisions, online streaming platforms |
| 4K (3840×2160) | Very Large | Very High | High-end televisions, cinematic productions |
Frame Rate Settings
Frame rate, measured in frames per second (fps), dictates the smoothness of motion in your video. Higher frame rates create smoother, more fluid movement, minimizing motion blur, while lower frame rates can lead to a choppy or jerky appearance. The appropriate frame rate depends on the type of video content.For example, action sequences benefit from higher frame rates (60fps or even 120fps) to capture fast-paced movements clearly.
Conversely, talking head videos or slower-paced narratives often use standard frame rates (24fps or 30fps), which are often perceived as more cinematic. Using a high frame rate for a talking head video might not necessarily improve the viewer experience and will increase file size unnecessarily.
Aspect Ratio Settings
Aspect ratio refers to the proportional relationship between the width and height of your video. Common aspect ratios include 16:9 (widescreen), 4:3 (standard definition), and 1:1 (square). The choice of aspect ratio impacts the composition and visual storytelling within your video.A 16:9 aspect ratio is prevalent in modern cinema and online video platforms, offering a wider field of view.
A 4:3 aspect ratio, while less common now, can create a more intimate or classic feel. A 1:1 aspect ratio, ideal for social media platforms like Instagram, allows for a more balanced and symmetrical composition. Consider the platform and the intended message when choosing an aspect ratio. For instance, a landscape-oriented video of a vast landscape would benefit from a 16:9 aspect ratio, emphasizing the breadth of the scene, while a portrait-style video focusing on a single subject might be better suited for a 1:1 or even a vertical aspect ratio.
Optimizing Video Settings for Different Platforms and Purposes
Choosing the right video settings is crucial for maximizing the impact of your videos. Different platforms have varying requirements and audiences, and understanding these nuances will significantly enhance your content’s reach and engagement. Furthermore, the style of your video—whether cinematic, vlog-style, or tutorial—will also influence the optimal settings. This section will explore how to tailor your video settings for optimal performance across various platforms and video styles.
Optimal Video Settings for Different Platforms
Selecting appropriate video settings for each platform ensures your videos look their best and are optimized for the viewing experience on that specific platform. Factors like resolution, frame rate, and aspect ratio significantly impact the visual quality and audience engagement. Ignoring these platform-specific guidelines can lead to poor-quality video playback and a less-than-ideal viewing experience for your audience.
- YouTube: Generally, YouTube supports a wide range of resolutions and frame rates. However, for optimal quality and viewer satisfaction, consider using a resolution of at least 1080p (1920×1080 pixels) at a frame rate of 30fps or 60fps. The standard aspect ratio is 16:9. Higher resolutions like 4K (3840×2160 pixels) are also increasingly common and provide superior quality, but require larger file sizes and more processing power.
- Instagram: Instagram prioritizes vertical video, so a 9:16 aspect ratio is highly recommended. Resolutions of 1080p are suitable, although lower resolutions might be acceptable for shorter videos. A frame rate of 30fps is generally sufficient.
- TikTok: Similar to Instagram, TikTok favors vertical video, making a 9:16 aspect ratio ideal. Resolutions from 720p to 1080p are acceptable, with 30fps being a standard frame rate.
Adjusting Settings for Different Video Styles
The style of your video heavily influences the optimal settings. A cinematic film requires a different approach compared to a fast-paced vlog or a detailed tutorial. Careful consideration of color grading, transitions, and text overlays will significantly impact the final aesthetic and viewer engagement.
- Cinematic Style: Cinematic videos often employ a shallow depth of field, creating a blurred background that emphasizes the subject. Warm color grading, smooth transitions (like fades or cross dissolves), and minimal text overlays contribute to a more polished and professional look. Higher frame rates (60fps) can enhance the smoothness of motion, but aren’t always necessary.
- Vlog Style: Vlogs often feature a more casual and spontaneous style. Color grading might be more natural and less stylized. Quick cuts and transitions are common, reflecting the dynamic nature of vlogging. Text overlays can be used to add context or highlight key points. A frame rate of 30fps is usually sufficient.
- Tutorial Style: Tutorials benefit from clear and concise visuals. Color grading should be consistent and easy on the eyes. Transitions should be smooth and unobtrusive, avoiding anything that might distract the viewer from the instructional content. Text overlays, screen recordings, and annotations are commonly used to guide viewers through the steps.
Optimizing Video Settings for Mobile Viewing
A significant portion of video consumption occurs on mobile devices. Therefore, optimizing video settings for smooth playback on various mobile devices is essential. File size and encoding settings play a crucial role in this optimization. Larger file sizes lead to longer loading times and increased data consumption, potentially frustrating viewers.
Efficient encoding methods, such as using H.264 or H.265 codecs, reduce file size without significantly compromising visual quality. Choosing the right bitrate is also important; a higher bitrate results in better quality but a larger file size. Finding a balance is key to ensuring high-quality playback while maintaining manageable file sizes for seamless streaming on mobile devices. Consider testing your videos on various devices and network conditions to ensure optimal performance.
Advanced Video Editing Techniques and Settings

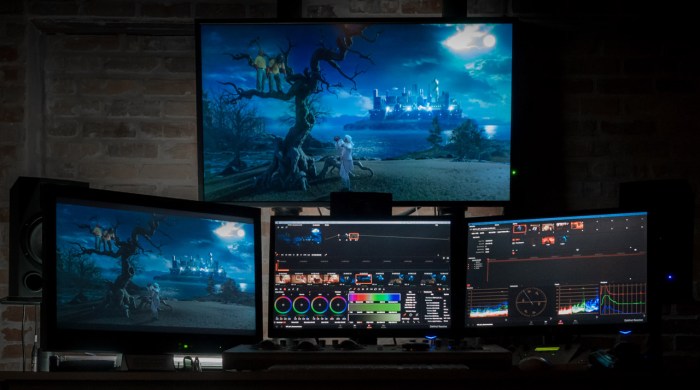
Mastering basic video editing is only the first step; truly compelling videos require a deeper understanding of advanced techniques and settings. This section will explore color correction and grading, audio enhancement, and efficient export workflows to elevate your video production.
By utilizing these advanced techniques, you can transform your footage from merely watchable to truly captivating, ensuring your videos leave a lasting impression on your audience. This involves not only technical proficiency but also a creative eye for detail, allowing you to communicate your message with impact and visual flair.
Color Correction and Grading Techniques
Color correction involves adjusting the colors in your footage to make them more accurate and consistent, while color grading is a more stylistic approach to manipulating color to create a specific mood or atmosphere. Both are crucial for professional-looking videos.
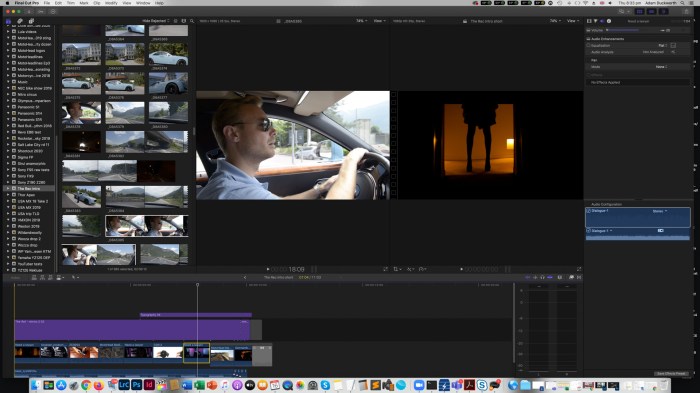
Let’s consider a scenario where your footage is slightly overexposed and has a generally washed-out look. Effective color correction can remedy this. Imagine a scene shot outdoors on a sunny day; the sky might be blown out, and the shadows too dark. To correct this, we’d use a color correction tool within our editing software.
Step 1: Adjust the Exposure slider to brighten the darker areas without overexposing the highlights. A visual representation would show a slider moving from a low value to a higher value, resulting in a noticeably brighter image. The overexposed sky would become less bright but retain detail, and the shadows would become clearer.
Step 2: Next, we would fine-tune the contrast. Again, a slider would be used to increase the difference between the light and dark areas. This would help to restore the natural depth of the scene. The visual would show a more defined separation between the light and dark areas of the image.
Step 3: To address the color cast, we might use a white balance tool. This would involve adjusting the color temperature and tint to achieve a more neutral and natural-looking image. Visually, this would result in a more balanced and true-to-life representation of colors. The image would look more vibrant and less artificial.
Color grading, on the other hand, allows for artistic interpretation. For example, to create a more cinematic and moody atmosphere, we might use a color grading tool to desaturate the colors slightly, and add a cool blue tint. This visual alteration would give the scene a more somber and serious tone.
Audio Settings and Enhancement
High-quality audio is just as crucial as high-quality video. Neglecting audio can significantly detract from the viewer experience. This section Artikels key audio settings and their functions.
Effective audio editing involves adjusting several parameters. This includes managing audio levels to avoid clipping (distortion caused by exceeding the maximum amplitude), using equalization (EQ) to adjust the balance of different frequencies, and applying noise reduction to eliminate unwanted background sounds.
For instance, imagine a scene with loud background noise like traffic. Applying noise reduction will significantly reduce this background hum, making the dialogue clearer and more understandable. Visually, this could be represented as a waveform showing a significant reduction in the amplitude of the lower frequency range, where the noise is most prominent.
Equalization allows for further refinement. If the audio sounds muddy, boosting the higher frequencies can create clarity. Conversely, if the audio is too harsh, reducing the high frequencies will make it smoother. A visual representation would show an EQ graph with adjustments made to different frequency bands, showcasing the changes made to the audio spectrum.
Finally, ensuring that the audio levels are balanced across different clips is crucial for a consistent listening experience. This is achieved by adjusting the volume levels of individual audio tracks to prevent any sudden jumps or drops in volume.
Video Export Workflow
Exporting your video correctly is the final, but equally crucial, step in the process. Choosing the right settings ensures your video looks and plays as intended on various platforms.
The export process involves selecting the appropriate codec (determines how the video is compressed), bitrate (controls the data rate of the video, affecting quality and file size), and container (the file format). Different platforms and devices have different requirements, making careful selection vital.
For example, exporting a video for YouTube might involve using the H.264 codec (widely compatible), a high bitrate for better quality, and the MP4 container (common and versatile). For a smaller file size suitable for mobile devices, a lower bitrate and possibly a different codec like H.265 (HEVC) could be used. The choice depends on the intended audience and platform.
The export settings are often presented as a panel in the editing software with fields for specifying the codec, bitrate, resolution, and container format. The user would input the desired values according to the intended platform and quality preferences. A visual representation would be a screenshot of this panel showing the various options available and the selected settings. This would illustrate how different settings can be chosen to optimize for different output needs.
Ultimate Conclusion
By understanding and strategically utilizing video editing settings, you can transform your videos from ordinary to extraordinary. This journey through resolution, frame rate, aspect ratio, platform optimization, and advanced techniques empowers you to create compelling visuals and impactful narratives. Remember that mastering these settings is an iterative process; experiment, refine, and most importantly, let your creativity shine through in every project.
The key is to consistently strive for a balance between technical proficiency and artistic vision, ensuring your videos not only look great but also effectively communicate your message.