Augmented reality (AR) offers the exciting possibility of seamlessly merging the digital and physical worlds. However, achieving a truly convincing blend requires careful adjustment of your AR settings. This guide explores how to optimize various parameters—from transparency and occlusion to field of view—to create a more immersive and realistic AR experience. We’ll examine techniques for enhancing the visual fidelity of virtual objects within your real-world environment, addressing common challenges and best practices along the way.
Understanding the interplay between AR settings and the resulting visual experience is crucial. Different devices and applications offer varying levels of control, impacting how convincingly virtual elements integrate with your surroundings. This guide will equip you with the knowledge to fine-tune your AR settings for a more believable and enjoyable augmented reality experience, regardless of the platform or application you use.
Understanding AR Settings and Their Impact on Reality Blending
Augmented reality (AR) overlays digital content onto the real world, creating a blended experience. The quality of this blend, however, is heavily dependent on various settings within the AR application and the device itself. Understanding and adjusting these settings is crucial for optimizing the user experience and achieving a seamless integration of the virtual and real.
AR settings significantly influence how realistically the virtual objects interact with the real world. These settings control aspects such as the transparency of virtual elements, how they interact with real-world objects (occlusion), and the overall field of view presented to the user. Mastering these settings allows for a more immersive and believable AR experience.
Locating and Accessing AR Settings Menus
Accessing AR settings varies across devices and applications. Generally, settings are found within the application’s main menu, often accessed via a gear icon or a settings button. For example, in many mobile AR apps, tapping the three vertical dots in the upper right corner usually opens a settings menu. On AR headsets, settings are typically accessible through an on-screen menu or a dedicated controller.
Some devices may require navigating to a system-level settings menu to adjust AR-specific options like camera permissions and sensor calibration. Always consult your specific device and application manuals for detailed instructions.
The Impact of AR Settings on Reality Blending
Different AR settings directly impact the perceived realism of the blended environment.
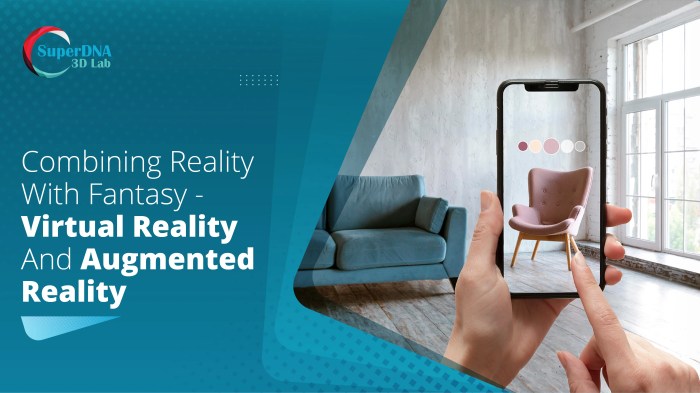
Transparency: This setting controls the opacity of virtual objects. A lower transparency value makes the virtual object more see-through, allowing the real-world background to be more visible. A higher value makes the virtual object more opaque, potentially obscuring the real world. For example, in an AR application showing furniture in your living room, a high transparency setting would allow you to see the existing furniture and walls through the virtual furniture, while a low transparency would make the virtual furniture appear solid, possibly hiding parts of your room.
Occlusion: This refers to how virtual objects interact with real-world objects. With good occlusion, virtual objects will appear to be behind or in front of real-world objects, correctly blocking or being blocked by them. For example, if a virtual ball is placed behind a real chair, a well-implemented occlusion system would ensure that the chair partially obscures the ball, enhancing the sense of depth and realism.
Poor occlusion results in the virtual object appearing to “float” in front of real objects, diminishing the believability of the augmented scene.
Field of View (FOV): This setting determines the width and height of the viewable AR scene. A wider FOV offers a more expansive view of the augmented reality, but can potentially reduce the detail and processing efficiency. A narrower FOV provides a more focused experience but limits the amount of real and virtual environment visible at any given time. Adjusting FOV can greatly affect the sense of immersion and the perceived scale of virtual objects within the real-world environment.
Comparison of AR Application Settings
The following table compares the AR capabilities and settings of three popular AR applications (Note: Specific settings and options may vary depending on the application version and device used).
| App Name | Transparency Setting Options | Occlusion Capabilities | Field of View Adjustment |
|---|---|---|---|
| Application A | Slider (0-100%) with presets | Plane-based occlusion | Automatic, based on device |
| Application B | Discrete levels (Low, Medium, High) | Limited object occlusion | Manual adjustment (slider) |
| Application C | Slider (0-100%) with custom presets | Advanced depth-based occlusion | Automatic and manual adjustment options |
Optimizing AR Settings for Seamless Reality Blending
Achieving a truly convincing blend of the real and virtual worlds in augmented reality requires careful optimization of various settings. The goal is to create an experience where virtual objects appear seamlessly integrated into the user’s environment, rather than looking like superimposed images. This involves understanding and manipulating several key aspects of the AR system.
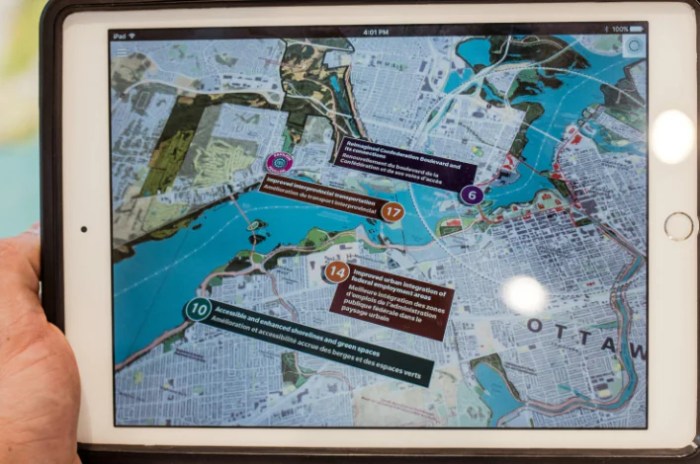
Environmental understanding is paramount for realistic AR experiences. AR applications need to accurately perceive the user’s surroundings to place virtual objects appropriately and realistically. This includes understanding the geometry of the space (walls, floors, objects), lighting conditions (ambient light, shadows), and surface properties (texture, reflectivity). Without accurate environmental understanding, virtual objects may appear to float in mid-air, clip through walls, or cast unrealistic shadows, breaking the illusion of seamless integration.
Techniques for Enhancing Virtual Object Realism
Several techniques are employed to improve the realism of virtual objects within the real world. Accurate lighting and shadowing are crucial. Virtual objects should be lit consistently with the real-world environment; for example, a virtual lamp should cast shadows that interact realistically with real-world objects. Similarly, reflections of virtual objects on real-world surfaces should be accurately simulated. Consider the example of a virtual vase placed on a glass table; the reflection of the vase in the table should be convincingly rendered.
Advanced techniques, such as physically based rendering (PBR), model the interaction of light with materials more realistically, enhancing the visual fidelity of the blended reality. Furthermore, occlusion – the ability for virtual objects to be hidden behind real-world objects – adds significantly to realism.
Impact of Display Technologies on Visual Fidelity
The display technology used significantly impacts the visual fidelity of the blended reality experience. OLED (Organic Light-Emitting Diode) displays offer superior contrast ratios and deeper blacks compared to LCD (Liquid Crystal Display) screens. This results in more vibrant and realistic virtual objects, particularly in scenes with significant variations in brightness. OLED’s per-pixel control also allows for more accurate representation of subtle details and shadows.
LCD displays, while more affordable, can suffer from backlight bleed and less accurate color reproduction, potentially leading to a less seamless blend between the real and virtual worlds. For example, a virtual object rendered on an OLED display might appear to blend naturally with the background, while the same object on an LCD display could appear slightly washed out or less defined, disrupting the immersive experience.
Adjusting AR Settings Based on User Surroundings
A flowchart can illustrate the process of adjusting AR settings to optimize the blend between real and virtual environments.
The following flowchart Artikels the decision-making process for optimizing AR settings:
[Flowchart Description] The flowchart would begin with a “Start” node. This would lead to a decision node asking “Is the environment well-lit?”. A “Yes” branch would proceed to a node adjusting “Shadow intensity (low)”. A “No” branch would lead to a node adjusting “Shadow intensity (high) and brightness (increased)”. Both branches would then converge at a node asking “Are there reflective surfaces present?”.
A “Yes” branch would adjust “Reflection settings (high)”, and a “No” branch would adjust “Reflection settings (low)”. Finally, both branches would converge at an “End” node, indicating the optimized settings based on the environment.
Advanced Techniques and Considerations for AR Reality Blending
Achieving a truly convincing blend of the real and virtual worlds in augmented reality requires a deep understanding of advanced techniques and careful consideration of the inherent limitations of current technology. This section delves into sophisticated methods for enhancing realism and addresses the challenges that developers and users alike face in striving for seamless integration.
Realistic Occlusion Methods in AR
Realistic occlusion, where virtual objects are correctly hidden behind real-world objects, is crucial for a believable AR experience. Several methods exist, each with its strengths and weaknesses. Image-based rendering uses depth information from cameras to determine where virtual objects should be occluded. This approach can be computationally expensive and struggles with complex or translucent real-world objects. Conversely, geometry-based rendering utilizes 3D models of the environment to calculate occlusion.
This method offers greater accuracy but requires detailed 3D models, which are not always readily available. A hybrid approach, combining both image-based and geometry-based techniques, often yields the most realistic results but increases complexity. The choice of method depends on the specific application’s requirements and available resources.
Challenges and Limitations of Current AR Technology
Current AR technology faces several significant challenges in achieving seamless reality blending. Accurate depth sensing remains a hurdle; inaccuracies in depth maps can lead to noticeable inconsistencies in occlusion and positioning of virtual objects. Computational power limitations can restrict the complexity of virtual environments and the sophistication of rendering techniques. Furthermore, lighting inconsistencies between the real and virtual worlds often create a jarring effect, breaking the illusion of seamless integration.
The need for precise tracking and registration of virtual objects within the real-world environment is another ongoing challenge; even minor tracking errors can result in a disjointed experience. Finally, the varying quality of AR hardware across devices contributes to inconsistencies in the overall user experience. For example, differences in camera resolution and processing power directly impact the quality of the AR overlay and its fidelity to the real-world environment.
Creating Specific AR Effects Using Settings
AR settings provide powerful tools for controlling the interaction between virtual and real-world elements. For instance, adjusting the “surface detection” setting allows developers to define how accurately virtual objects interact with real-world surfaces. A high-accuracy setting enables virtual objects to seamlessly sit on tables or rest against walls, appearing naturally integrated into the scene. Similarly, manipulating the “lighting” settings can improve the visual realism by matching the virtual object’s lighting to the ambient lighting in the real world.
This reduces the stark contrast between the virtual and real elements. Advanced settings allow for the manipulation of transparency and shadowing, further enhancing the integration. For example, a virtual cup placed on a table could cast a realistic shadow, enhancing the sense of immersion.
Best Practices for Optimal Visual Comfort and Motion Sickness Prevention
To ensure optimal visual comfort and minimize motion sickness, users should follow several best practices when using AR applications focused on reality blending.
- Start with shorter usage sessions and gradually increase the duration as you become accustomed to the technology.
- Ensure adequate lighting in the real-world environment to reduce eye strain and improve the blending of virtual and real elements.
- Maintain a stable viewing position to minimize tracking errors and prevent disorientation.
- Choose AR applications with smooth frame rates to avoid jarring visual effects that can induce motion sickness.
- Take breaks frequently to allow your eyes to rest and prevent fatigue.
- Consider using AR applications with features designed to minimize motion sickness, such as frame rate optimization and field of view adjustments.
Final Thoughts
Mastering AR settings is key to unlocking the full potential of augmented reality. By understanding the impact of transparency, occlusion, field of view, and other settings, you can significantly improve the realism and immersion of your AR experiences. Remember to prioritize visual comfort and consider the limitations of current technology to avoid motion sickness and frustration. With practice and careful adjustment, you can transform your AR interactions into a truly blended reality, where the virtual and physical seamlessly coexist.