Unlock the full potential of your computer by mastering its system settings. This guide provides a comprehensive exploration of how to personalize your digital experience, from tweaking visual aesthetics to optimizing performance and enhancing accessibility. Whether you’re a seasoned user seeking advanced customization or a newcomer looking to personalize your workspace, this resource offers practical, step-by-step instructions tailored to various operating systems—Windows, macOS, and Linux—ensuring a smoother, more efficient, and enjoyable computing experience.
We will delve into adjusting settings across diverse areas, including power management, performance optimization, and accessibility features. Learn how to fine-tune your system to perfectly match your individual needs and preferences. From changing your desktop background to managing startup applications and configuring keyboard shortcuts, this guide equips you with the knowledge to transform your computer into a truly personalized workspace.
Operating System Specific Settings

Customizing your computer’s operating system allows you to tailor its appearance and functionality to your preferences. This involves adjusting various settings, which differ significantly depending on the operating system you are using. This section will guide you through some common customization options for Windows, macOS, and Linux.
Changing Desktop Background in Windows 10
Modifying your desktop background is a simple yet effective way to personalize your Windows 10 experience. The following steps Artikel the process:
| Step Number | Action | Screenshot Description |
|---|---|---|
| 1 | Right-click on an empty area of your desktop. | A context menu appears, showing options like “Personalize,” “Display settings,” etc. |
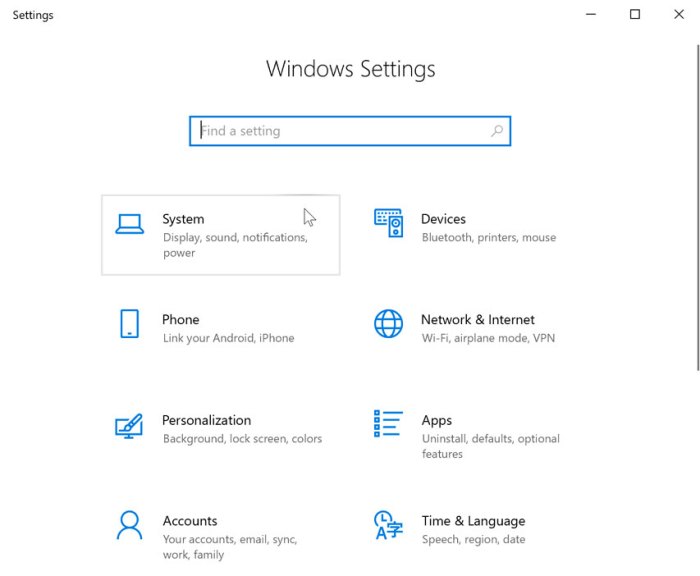
| 2 | Select “Personalize” from the context menu. | This opens the “Settings” app to the “Personalization” page. |
| 3 | Click on “Background” in the left-hand navigation pane. | The right-hand pane displays options for choosing a background image, slideshow, or solid color. |
| 4 | Choose your preferred background option (Picture, Slideshow, or Solid color). | Depending on your choice, you’ll be able to browse your files for images, select a slideshow from a folder, or pick a solid color. |
| 5 | Select the image or color you want to use as your background. | Your desktop background will immediately change to your selection. |
Adjusting Screen Resolution and DPI Settings in macOS
Screen resolution and DPI (dots per inch) settings significantly impact the clarity and size of elements displayed on your screen. Adjusting these settings can improve readability and overall user experience. macOS offers a range of resolution options.
Choosing a resolution involves a trade-off between screen clarity and the number of items visible. Higher resolutions provide sharper images but may require more scaling, making text and icons appear smaller. Lower resolutions offer larger, easier-to-see items but at the cost of image clarity.
- Lower Resolutions (e.g., 1024×768): Suitable for smaller screens or users who prefer larger on-screen elements. Text and icons will be larger, but images may appear less sharp.
- Standard Resolutions (e.g., 1920×1080): A common and balanced option offering a good compromise between clarity and screen real estate. Suitable for most displays.
- Higher Resolutions (e.g., 2560×1440, 4K): Provide the sharpest images and more screen real estate, ideal for larger screens and users who value detail. Text and icons may appear smaller, necessitating adjustments to DPI settings.
DPI settings control how many pixels are used to render each inch of the screen. Adjusting DPI can make text and icons appear larger or smaller without changing the actual screen resolution.
Customizing the Taskbar and System Tray in Windows 11
The taskbar and system tray are crucial elements of the Windows 11 interface. Customizing them enhances both functionality and aesthetics.
- Adding or Removing Taskbar Icons: Right-click on the taskbar, select “Taskbar settings,” and then navigate to “Taskbar behaviors.” Here you can choose which icons are displayed on the taskbar. You can pin frequently used applications for easy access or unpin less-used ones to declutter the taskbar.
- Changing Taskbar Location: Within the “Taskbar settings,” you can choose to locate the taskbar at the top, bottom, left, or right of the screen.
- System Tray Icon Management: Right-clicking on individual icons in the system tray allows you to open their settings, disable notifications, or even exit the application associated with the icon.
- Taskbar Size Adjustment: The “Taskbar settings” allow for adjusting the size of the taskbar, making it smaller or larger to suit your preferences and screen space.
Changing the Default Browser in Linux
The method for changing the default browser in Linux varies slightly depending on the specific distribution, but generally involves using the command line. The process usually involves updating the system’s settings to point to the preferred browser’s executable.
A typical process might involve identifying the path to the new browser’s executable (e.g., `/usr/bin/firefox`) and then using a command (the exact command varies based on your desktop environment) to update the default browser setting. This might involve setting an environment variable or modifying a configuration file. A visual representation of this process could be imagined as a series of lines in a terminal window, showing the commands typed by the user and the system’s responses, culminating in a confirmation message indicating the successful change.
For example, a simplified text-based representation could look like this:
user@linux:~> sudo update-alternatives --config x-www-browser
There are 2 choices for the alternative x-www-browser (providing /usr/bin/x-www-browser).
  Selection    Path                                            Priority   Status

------------------------------------------------------------
- 0 /usr/bin/firefox 10 auto mode
1 /usr/bin/chromium 5 manual mode
Press to keep the current choice[*], or type selection number: 1
user@linux:~>
This indicates the user selected chromium as the default browser.
Power Management and Performance Options

Optimizing your system’s power management and performance settings can significantly impact both battery life and responsiveness. This section explores techniques for fine-tuning these settings across different operating systems, allowing you to tailor your computer’s behavior to your specific needs. Understanding the interplay between power consumption and performance is key to achieving the best balance for your workflow.
Windows Power Plans and Their Impact
Windows offers several pre-defined power plans that affect processor speed, screen brightness, and other power-hungry components. Choosing the right plan significantly impacts battery life and performance. The following table illustrates the differences:
| Power Plan | Processor Performance | Screen Brightness | Battery Life | Performance |
|---|---|---|---|---|
| High Performance | Maximum | High | Low | Excellent |
| Balanced | Moderate | Moderate | Moderate | Good |
| Power Saver | Minimum | Low | High | Acceptable |
You can access and modify these plans through the Control Panel (search for “Power Options”). Consider creating a custom power plan to fine-tune settings further to achieve the optimal balance between performance and battery life for your individual needs.
Virtual Memory Management in Windows
Virtual memory allows Windows to use a portion of your hard drive as an extension of your RAM. Adjusting its settings can impact system performance, particularly when dealing with resource-intensive applications. Increasing virtual memory can improve performance when your RAM is frequently maxed out; however, excessive virtual memory can slow down performance as accessing data from the hard drive is significantly slower than from RAM.
Decreasing virtual memory, on the other hand, may lead to instability if your RAM is insufficient.Consider increasing virtual memory if you frequently experience slowdowns or application crashes due to insufficient RAM. Conversely, if your system is running smoothly with ample RAM, you might not need to adjust virtual memory settings. Changes to virtual memory settings are made through the System Properties in the Control Panel (search for “System”).
Managing Startup Applications on macOS
Managing applications that launch automatically on startup is crucial for improving boot times and minimizing resource consumption. Many applications automatically add themselves to the login items list, consuming resources even before you begin using them. Disabling unnecessary startup items can significantly improve the overall responsiveness of your Mac.Many applications add themselves to the login items list, consuming resources even before you begin using them.
Disabling unnecessary startup items can significantly improve the overall responsiveness of your Mac.
- Mail: Constantly checks for new emails, impacting boot time and resource usage. Disabling can improve startup speed, but you’ll need to manually check for new emails.
- Dropbox/Google Drive/OneDrive: Synchronizes files in the background. While useful, it consumes resources. Consider delaying their startup.
- Microsoft Teams/Slack: These communication applications often launch at startup, consuming memory and processing power. Delaying their startup until needed can be beneficial.
- Adobe Creative Cloud: Keeps applications updated in the background, consuming resources. Delaying or disabling its startup might improve boot times, but updates will be delayed.
You can manage startup applications in macOS System Preferences under “Users & Groups,” then selecting your user account and clicking “Login Items.”
Enabling or Disabling Hardware Acceleration in Linux
Hardware acceleration leverages your graphics card to process graphics-intensive tasks, potentially improving performance in applications like web browsers and video editors. However, enabling it can sometimes lead to instability or glitches. The process of enabling or disabling hardware acceleration varies depending on the specific application and your graphics driver.
- Identify the application: Determine which application you want to adjust hardware acceleration for (e.g., a web browser or video editor).
- Locate settings: Most applications have settings related to hardware acceleration within their preferences or options menus. Look for options like “Use hardware acceleration,” “Enable GPU acceleration,” or similar terminology.
- Toggle the setting: Enable or disable the hardware acceleration option. Restart the application to apply the changes.
- Monitor performance: Observe the application’s performance after making the change. If you encounter instability or glitches, revert the setting.
Enabling hardware acceleration can significantly improve the performance of graphics-intensive applications, but it can also lead to crashes or glitches if your graphics driver is not properly configured or the application is not compatible. Disabling it might improve stability but reduce performance.
Accessibility and Personalization Features

Customizing your computer’s settings extends beyond performance and power management; it also encompasses accessibility features and personalization options that significantly impact user experience and productivity. These settings allow you to tailor your computer to your specific needs and preferences, creating a more comfortable and efficient workspace. This section will explore how to configure these settings on different operating systems.
Windows Keyboard Shortcuts and Mouse Settings
Improving accessibility in Windows often begins with configuring keyboard shortcuts and mouse settings. These adjustments can dramatically enhance usability for individuals with various needs, including those with mobility impairments or visual limitations. The following table details some useful keyboard shortcuts and their accessibility benefits.
| Shortcut | Function | Accessibility Benefit |
|---|---|---|
| Windows Key + Space | Switch input language | Helpful for users who need to switch between different languages quickly. |
| Windows Key + Tab | Open Task View | Provides a visual overview of open windows and virtual desktops, improving organization and navigation. |
| Windows Key + L | Lock the computer | Enhances security and protects user data. |
| Alt + Tab | Switch between open applications | Efficiently navigate between programs without using a mouse. |
| Ctrl + Shift + Esc | Open Task Manager | Allows users to monitor and manage running processes. |
Further customization of mouse settings, such as increasing pointer speed or enabling mouse click lock, can be accessed through the Windows settings menu. These adjustments cater to users who find standard mouse operation challenging.
macOS Personalization Options
macOS provides a wide range of personalization options, allowing users to tailor the appearance of their user interface to match their aesthetic preferences and improve usability. These options extend to font selection, color schemes, and other visual elements, creating a more personalized and comfortable computing environment.
- Font Selection: macOS allows users to change the system font, affecting the appearance of text across the operating system. Users can choose from a variety of pre-installed fonts or install additional fonts from third-party sources. This is particularly helpful for users with visual impairments who may find certain fonts easier to read.
- Color Schemes: Users can select from several pre-defined color schemes or create custom schemes to adjust the overall appearance of the user interface. This can be crucial for users with visual sensitivities or color blindness, allowing them to choose color combinations that provide optimal contrast and readability.
- Dark Mode: macOS offers a dark mode option, which inverts the colors of the user interface, reducing eye strain in low-light conditions. This can significantly improve comfort for users working in dim environments or those sensitive to bright light.
- Desktop Pictures: Users can customize their desktop background with images or slideshows, adding a personal touch to their workspace. This simple personalization can significantly improve the user’s overall experience.
Linux Notification Settings Customization
Effectively managing notifications is vital for maintaining focus and minimizing distractions in Linux. Several methods exist to customize notification settings, allowing users to filter notifications based on application or priority level, ensuring only essential alerts receive attention.
- Notification Daemon Settings: Most Linux distributions utilize a notification daemon (such as Notify-OSD or libnotify) which manages notifications. Users can configure these daemons to adjust notification behavior, such as sound, visual alerts, and notification duration. These settings are typically accessible through the distribution’s system settings.
- Application-Specific Settings: Many applications allow for individual notification settings. Users can often choose to disable notifications altogether, or customize their frequency and appearance for specific applications.
- Do Not Disturb Modes: Several Linux desktop environments provide “Do Not Disturb” modes, temporarily silencing all or specific types of notifications for a set period. This is highly effective for focused work sessions.
- Third-Party Notification Managers: Some third-party notification managers offer more advanced customization options, such as filtering notifications based on s or sender. These tools provide granular control over notification behavior.
Windows User Account Management and Security
Managing user accounts with different permission levels on a Windows system is crucial for maintaining system security and protecting user data. Each user account type offers a specific set of permissions, influencing the level of access to system resources and files. Mismanaging these permissions can lead to security vulnerabilities.
| User Role | Permissions | Security Implications |
|---|---|---|
| Administrator | Full access to system resources and files. Can install software, change system settings, and manage user accounts. | High risk if compromised. Malware or malicious users with administrator privileges can cause significant damage. |
| Standard User | Limited access. Can use applications and access personal files, but cannot install software or make significant system changes. | Lower risk than administrator accounts. Compromised standard user accounts pose less of a threat to the overall system. |
| Guest | Very limited access. Primarily for temporary use, with limited privileges and no ability to save changes. | Lowest risk. Guest accounts are generally safe, as they offer minimal access to system resources. |
It’s recommended to use standard user accounts for everyday tasks and only use administrator accounts when necessary to perform system administration tasks. This minimizes the risk of accidental or malicious damage to the system.
Final Summary
By understanding and effectively utilizing your system’s settings, you can significantly enhance both the functionality and the aesthetic appeal of your computer. This guide has provided a structured approach to customizing various aspects of your operating system, empowering you to tailor your digital environment to your specific requirements. Remember that experimentation is key—explore the options, discover what works best for you, and enjoy the process of creating a truly personalized computing experience.
The potential for customization is vast; embrace it and make your computer truly your own.